


You're thinking, what the %$*@! Why hasn't this woman posted anything about a kitchen and then, bam! there is a 90% complete kitchen in the house? Well, I delayed writing to finish the cabinets. Then life got more then crazy and I was too tired to write. And finally, after being mentally able to write, I didn't have access to the computer to edit photos and write. It is actually even more "finished" then in the picture but I didn't update the photos.
Now, I write.
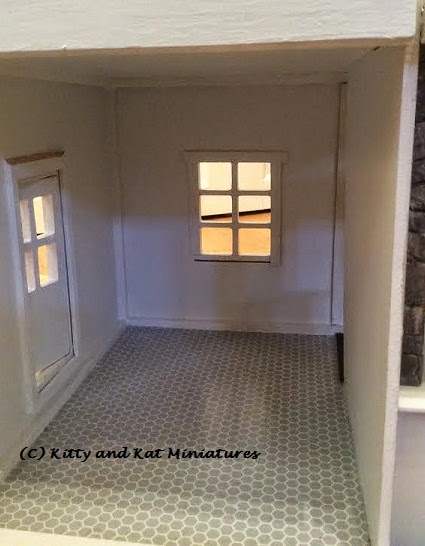
The kitchen gave me a headache. The extra door and the window made it really difficult to place my kitchen cabinets. Mind you, I bought them last year before really getting into this hobby. I would have purchased the Houseworks set instead. But, hindsight is 20/20.
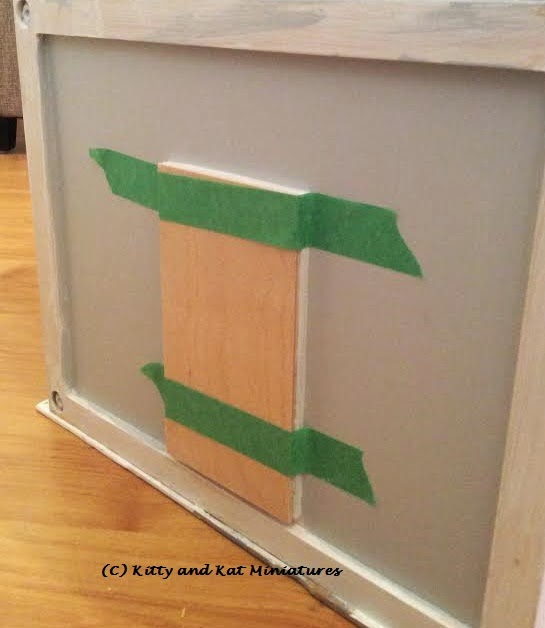
So I closed off the door in the kitchen. Boom! Problem solved. I used plywood and glue on the exterior. Then I used white card stock on the interior and sealed the door off. I used LePage's No More Nails as my glue and filled the gaps around the card stock with it. I sanded away the extra glue and got a great finish. Mind you, it was 90% hidden in the end, but I liked the look.

The white walls are painted CIL Eggshell "Romance." Other then when the camera flash lights the room, you really don't see the seams of the card stock.
Make It Stainless!

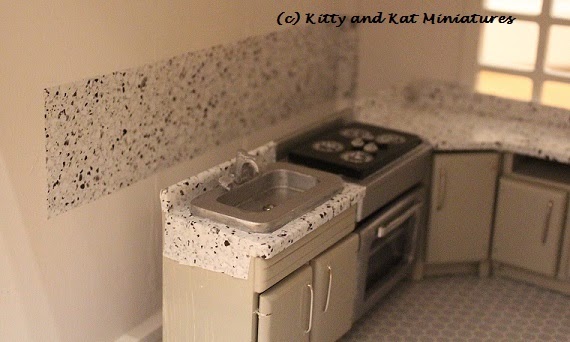
The fridge was white. I wanted stainless steel, along with the stove.
I used 2 coats of a medium grey to base coat and followed it up with 4 thin coats of silver. The silver is merely a top coat with next to no coverage so you need the grey coat to make it look like stainless steel.
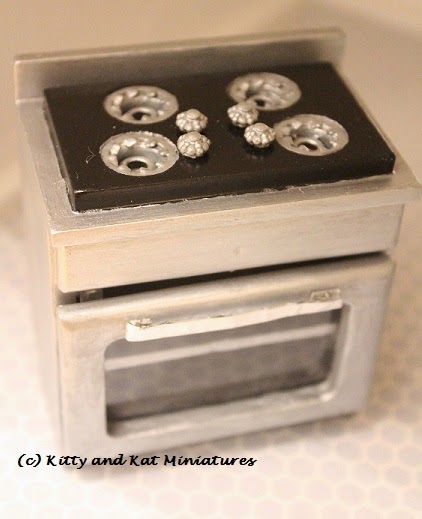
The stove had little brass handles/knobs on the front. Didn't like it. So, I made knobs on the top with small beads and a nail.
Genius here realized when editing photos that she didn't put on a knob for the stove on the front. I corrected this and made my own digital display (painted of course) and a Wolf stove logo too. I'll post that later on the finale.
I also printed a Sub Zero logo for my fridge!
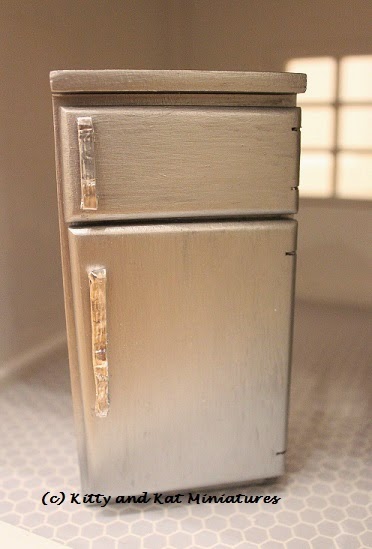
I used metal from tea lights to make new handles. I folded it several times to make it thicker and then used small brads to nail it to the fridge.
It works for Miss Kitty. It looked good before she smashed them flat. The metal isn't thick enough to hold its shape. Meh. You live you learn.
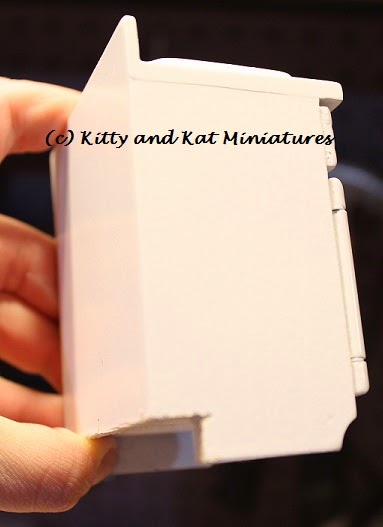
The cabinets started off white. A bit too white. Then I thought, why make the tops and bottoms match? So many things to think about.
I notched all the base cabinets to fit around the little bump out along the floor. Very easily done with my coping saw.
I then primed them with Zinsser 1-2-3 primer and painted them with some Martha Stewart eggshell paint I had laying around.
Granite? Why yes!
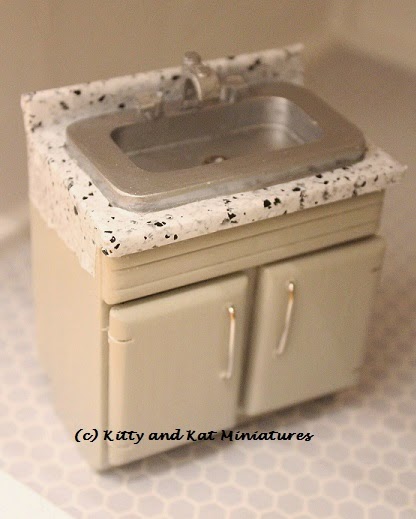
I chose shelf lining paper for the counters. I had even bought the pastel pencils and was ready to make a faux marble counter. Then I stopped and asked myself, are you crazy? Leave that for the next dollhouse.
I went to Walmart and found Contact Paper brand faux granite shelf liner. I used the black and grey look, but also bought the beige and grey version because I wasn't sure which one I wanted.
I had tried the dollar store version of faux marble. Very nice looking, but really tough to work with. Spend the money, it is just a better product for $7. And you have a giant roll of it for future projects or shelf lining.
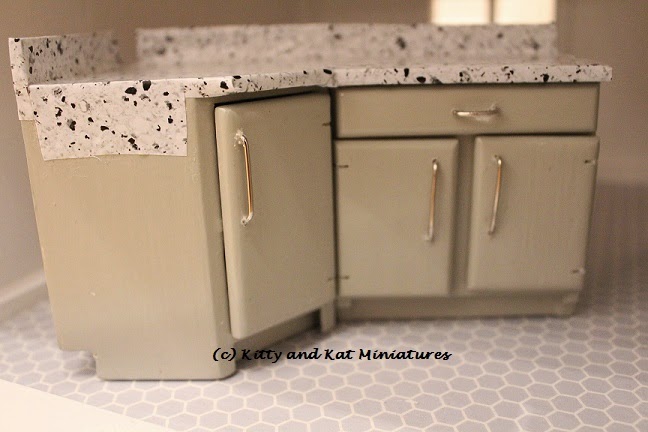

As you can see from the 2 above pictures, the contact paper was simply placed on the counter. HA! If it was only that easy. I wanted to glue it to ensure it would never peel up. After all, contact paper by nature is removable. I cut approximate sizes and did a test run before I glued. I definitely used my little plastic ruler to help press it into creases and my knife to trim as I went. The best thing about this faux granite is that you can work in pieces and not see seams because of the pattern. I am so very picky and I did not see any cut seams. Because if I had that's all I would have fixated on. DO NOT use a heavy duty adhesive like Quick Grip glue. The paper bubbles and ripples on the large stretches. Use wood glue or regular white glue. I did use Quick Grip on the edges that could not be seen to prevent any possibility of roll up.
I glued the 2 counter sections above together since they butted up to each other and put the paper on as 1 solid piece.
The Backsplash
For the backsplash I was torn. I started cutting tiny white subway tiles from card stock. Then I stopped. Hello!! You have contact paper, so why make life harder?
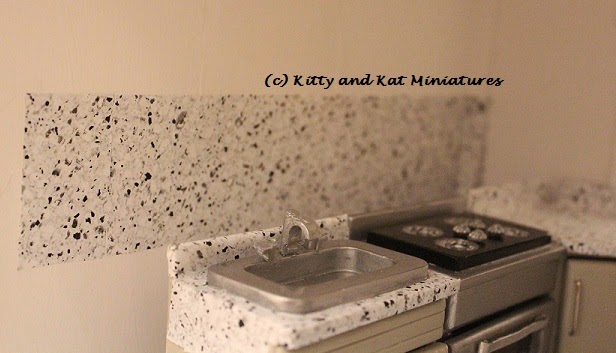
All it took was a little forethought in setting out how high I wanted my upper cabinets. Then I cut a strip of contact paper and stuck it down. I didn't use glue for this area. Instead, both the upper and lower cabinets adhered to it, so the edges were sealed.
The Extras
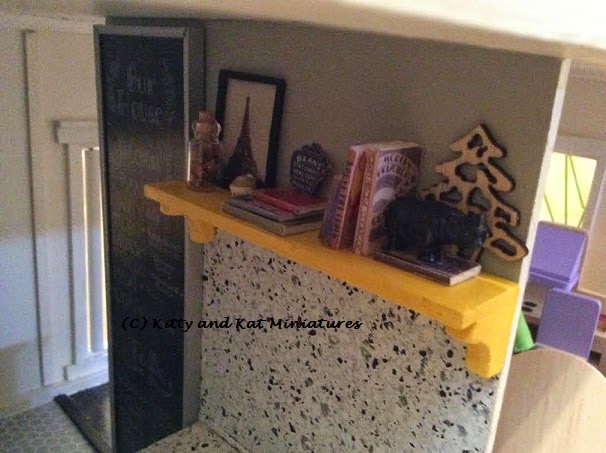
I made a floor to ceiling chalkboard for the kitchen. I actually would love one in my kitchen, so I made it mini instead! I will post about that project later.
I made the shelf and the brackets from pieces of balsa. I hate balsa. It is so easy to cut but I hate the finish and how careful you have to be. I'm counting the minutes until I get a scroll saw so I can use better wood without cutting off my fingers to get the cuts I want.
I used a few printies to make the cookbooks (see my Pinterest page). The tree was a little Christmas do-dad from Target. The Eiffel Tower picture is from scrapbook paper. The Beans teapot sign is blue and lacquered. The glass jar is filled with mini corks, an ode to my personal collection. And the rhino bookend is a bead that I used caulking to fill the holes in and spray painted matte black.
With all the grey and black in the room I chose bright yellow as my accent. It will appear in later pictures on the drapes, small appliances and frames.
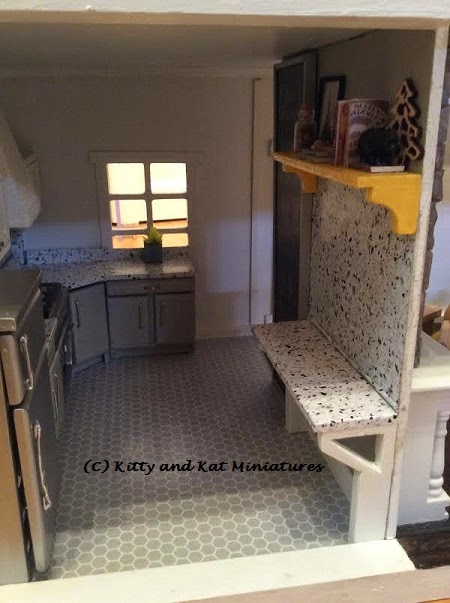
I thought it might be a little too tight to add in a table and chairs, so I opted to make a breakfast bar area. The counter is set at "bar" height, 36". Which is actually the height of my kitchen cabinets. I think the cabinets seem a bit high. Oh well. I made the brackets from balsa and painted them CIL "Romance." I took the granite contact paper all the way to the shelf for some visual interest.
I added in some baseboard and my little vent. Gotta have good air flow.
I promise to try and write more.


